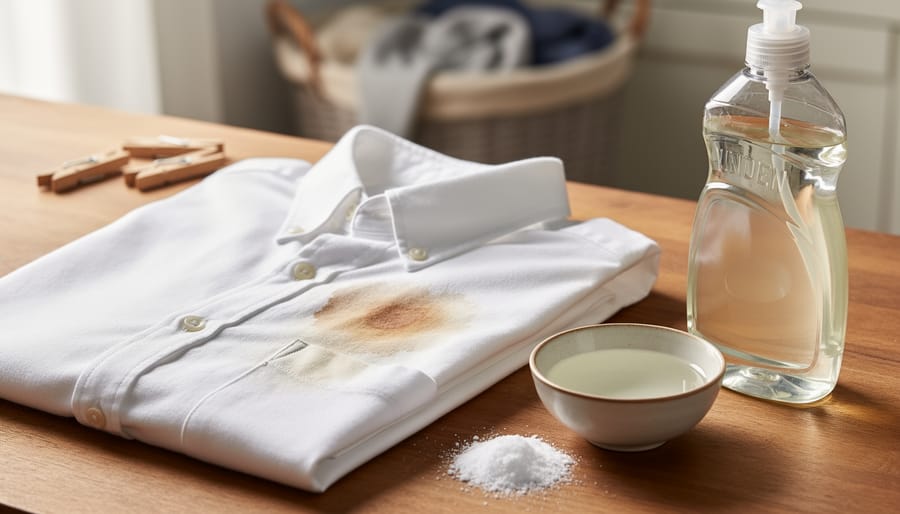
How to Remove Stubborn Stains and Residue from Clothes (Without Tossing Them)
You can rescue most stained clothes in under 30 minutes using natural ingredients already in your kitchen. Instead of tossing a favorite shirt because of stubborn residue, a targeted combination of white vinegar, baking soda, and dish soap breaks down everything from grease to ink without harsh chemicals or expensive treatments.
Every year, millions of garments end up in landfills simply because people don’t know effective stain removal techniques. The truth is, most fabric “disasters” are entirely reversible when you understand how different stains bond to fibers and which household solutions dissolve them. This approach saves money, extends the life of your wardrobe, and perfectly embodies what zero waste means in everyday practice.
The methods we’re sharing work on common culprits like coffee, wine, oil, grass, and makeup. They’re gentle enough for delicate fabrics yet powerful enough to tackle set-in stains you might have given up on months ago. You won’t need a chemistry degree or a cabinet full of specialty products.
What makes these techniques especially valuable is their accessibility. Whether you’re dealing with fresh spills or discovering old marks, the step-by-step process adapts to your situation. You’ll learn not just how to treat stains, but how to verify they’re truly gone before heat-setting them permanently in the dryer. For specialized challenges like removing gum from clothing, Mustang Hygiene’s cleaning guides complement these natural methods beautifully.
Why Rescuing Stained Clothes Matters
Tossing a stained shirt might feel like the easiest solution, but that single decision carries an environmental weight most of us don’t see. The fashion industry already accounts for roughly 10% of global carbon emissions, and when we discard clothes prematurely, we’re feeding a cycle that demands constant replacement. Every new garment requires thousands of litres of water to produce, cotton cultivation alone can use up to 20,000 litres per kilogram of fabric. When that stained jumper hits the bin instead of getting a second chance, all those resources vanish for nothing.
The landfill impact tells an even grimmer story. Textiles make up a growing portion of municipal waste, and most synthetic fabrics can take 200 years or more to decompose while releasing methane and toxic chemicals into soil and groundwater. Natural fibres fare slightly better but still waste the embodied energy and materials invested in their creation. We’re essentially burying perfectly functional clothing that needs nothing more than a targeted treatment and a bit of patience.
Stain removal isn’t just about thrift, it’s a powerful sustainability practice that extends garment life and challenges our throwaway culture. When you rescue a coffee-stained shirt or remove deodorant buildup from a favourite dress, you’re actively participating in zero-waste living tips that create real impact. This connects naturally to sustainable fashion principles: caring for what we already own matters just as much as buying responsibly.
The collective impact grows when we share these skills. Every person who learns to rescue clothes instead of binning them becomes part of a community pushing back against fast fashion’s environmental toll.
What You’ll Need: Essential Tools and Natural Materials
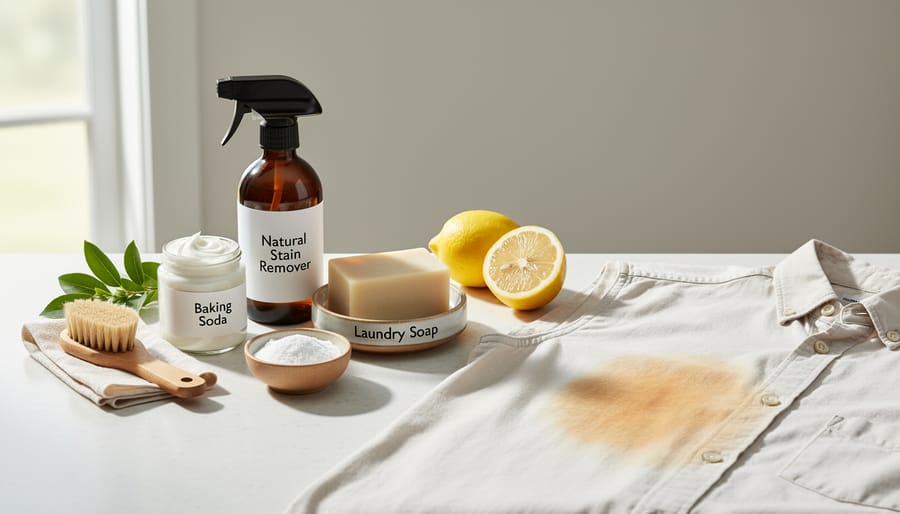
You don’t need a cupboard full of harsh chemicals to rescue stained clothes. A modest collection of natural ingredients and basic tools will handle the vast majority of stains and residue you’ll encounter. Most of these items are probably already in your kitchen or laundry room, making clothing rescue both accessible and affordable.
Start with these core natural stain fighters, each serving a specific function:
- Absorbents: Baking soda and cornstarch lift fresh oil and grease before they set into fibers
- Acids: White distilled vinegar (5% acidity) and fresh lemon juice break down mineral deposits, tannins, and alkaline residue from detergents
- Enzymes: Castile soap or enzyme-based eco detergents tackle protein stains like blood and food
- Oxidizers: Oxygen bleach (sodium percarbonate) brightens whites and lifts set-in stains without chlorine’s harsh environmental impact
- Surfactants: Pure dish soap cuts through grease and oil-based stains effectively
Beyond ingredients, you’ll want a few simple tools that protect fabric while working treatments into fibers. Soft-bristled brushes, old toothbrushes, and microfiber cloths let you gently agitate stains without abrading delicate weaves. Glass or stainless steel spray bottles make it easy to apply diluted vinegar or soap solutions evenly. A couple of large stainless steel bowls or basins work perfectly for soaking particularly stubborn stains.
When selecting products, read labels carefully and look for certifications like USDA Organic, EWG Verified, or Leaping Bunny to ensure genuinely eco-friendly formulations. Many conventional “natural” cleaners still contain synthetic fragrances or petroleum-derived surfactants. Source from transparent brands that list full ingredient disclosures and use recyclable or refillable packaging. Local refill shops, cooperative grocers, and dedicated eco-retailers often stock concentrated versions that reduce packaging waste while stretching your budget further.
Keep your stain-fighting kit in one accessible spot so you can act quickly when accidents happen. Speed matters more than having every possible ingredient, so start with vinegar, baking soda, and dish soap, that trio alone will handle most common clothing mishaps.
Safety First: What to Check Before You Start
Before you tackle any stain, take five minutes to protect your clothes from accidental damage. The wrong treatment on the wrong fabric can turn a salvageable garment into landfill fodder.
Start by reading the care label inside the garment, those symbols tell you maximum safe temperatures, whether the fabric can handle bleach alternatives, and if water treatments are even appropriate. Natural fibers like cotton and linen typically tolerate aggressive treatments, while silk, wool, and synthetics need gentler approaches. If the label says “dry clean only,” you can still attempt spot treatments with diluted solutions, but proceed with extreme caution.
Always test your chosen treatment on a hidden area first: inside seams, under collars, or hem fold-overs work well. Dab a small amount of your solution, wait five minutes, then blot with a white cloth to check for color transfer or fabric weakening. This thirty-second test can save an entire garment.
Know when to stop. If you’ve tried two treatment rounds without improvement, or if the fabric shows any signs of fiber breakdown, pilling, or color loss, it’s time to consult a professional cleaner who specializes in eco-friendly methods. Delicate vintage pieces, structured garments with interfacing, and anything with embellishments deserve professional attention from the start. Your goal is rescue, not risk.
Step-by-Step Stain Removal Process
Identify the Stain and Act Fast
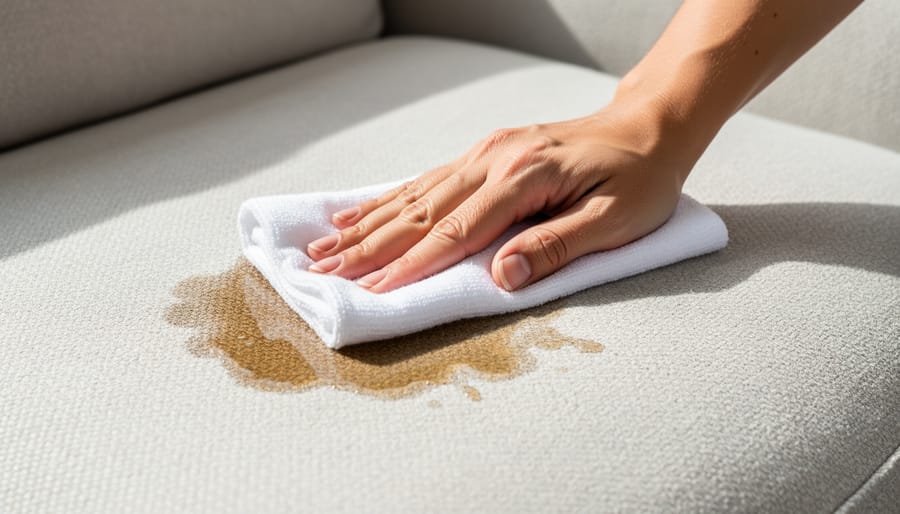
The moment you spot a stain, your first move determines whether it lifts easily or becomes a permanent resident. Fresh stains haven’t bonded with fabric fibers yet, giving you a crucial window of opportunity before they set.
Start by identifying what caused the stain. Protein-based stains (blood, dairy, egg) need cold water and enzyme action. Oil and grease stains require a degreaser like dish soap. Tannin stains from coffee, wine, or tea respond to acid treatments. Dye transfer needs alcohol-based solutions. If you’re unsure, defaulting to cold water and gentle blotting buys you time without risking heat damage.
For fresh stains, seconds count. Blot immediately with a clean cloth, don’t rub, which pushes the stain deeper. Scrape off any solid residue with a spoon edge. Flush the stain from the back with cold water, forcing it out the way it came in rather than through the fabric.
Even if you can’t treat the stain properly right away, this quick response prevents it from oxidizing and setting. A five-second intervention can mean the difference between an easy fix and a garment you’re tempted to bin.
Pre-Treatment Techniques
Before applying any cleaning solution, proper pre-treatment sets the stage for successful stain removal. Your first move depends on the stain’s consistency. For wet spills, blot gently with a clean white cloth or paper towel, working from the outside edges toward the center to prevent spreading. Never rub, this pushes the stain deeper into fibers and can damage delicate fabrics. Dried or sticky substances need careful scraping instead. Use a dull butter knife or spoon edge to lift away excess material, holding the fabric taut but not stretched.
Cold water is your next ally for fresh stains. Flush the stained area from the back of the fabric under running cold water for 30 seconds to a minute. This pushes the stain outward rather than through the fibers. Hot water sets protein-based stains like blood or egg, so stick with cold until you’re certain of the stain type.
Once you’ve removed surface material and flushed the area, apply a targeted pre-treatment. For most stains, a paste of baking soda and water works well. Gently work it into the fabric with your fingertips, let it sit for 10 to 15 minutes, then proceed to your main treatment method.
Apply Natural Treatment Solutions
Once you’ve identified your stain type, matching it to the right natural treatment becomes straightforward. The key is understanding how different ingredients work on specific substances.
For protein-based stains like blood, egg, or dairy, enzymatic action is your friend. Mix cold water with a small amount of castile soap or use diluted white vinegar, both help break down protein molecules. Apply directly to the stain and let it sit for 15-30 minutes. Never use hot water on protein stains; heat bonds them permanently to fabric.
Oil and grease respond best to absorbents combined with gentle solvents. Sprinkle baking soda or cornstarch directly onto the stain to draw out the oil, let it sit for 20 minutes, then brush away. Follow with a few drops of dish soap (choose a plant-based option) worked gently into the fabric with your fingers.
Tannin stains from coffee, tea, or wine need acid treatment. White vinegar diluted 1:1 with water works brilliantly, pour it over the stain and watch it lighten within minutes. For stubborn cases, make a paste with lemon juice and cream of tartar, apply it, and leave for an hour before rinsing.
Dye transfer and set-in stains require oxidizers. Oxygen bleach (sodium percarbonate) mixed with warm water creates a gentle soaking solution that lifts color without chlorine’s harshness. Submerge the stained area for two to four hours, checking progress periodically.
Always apply treatments from the back of the fabric, pushing the stain out rather than deeper in.
Gentle Agitation and Soaking
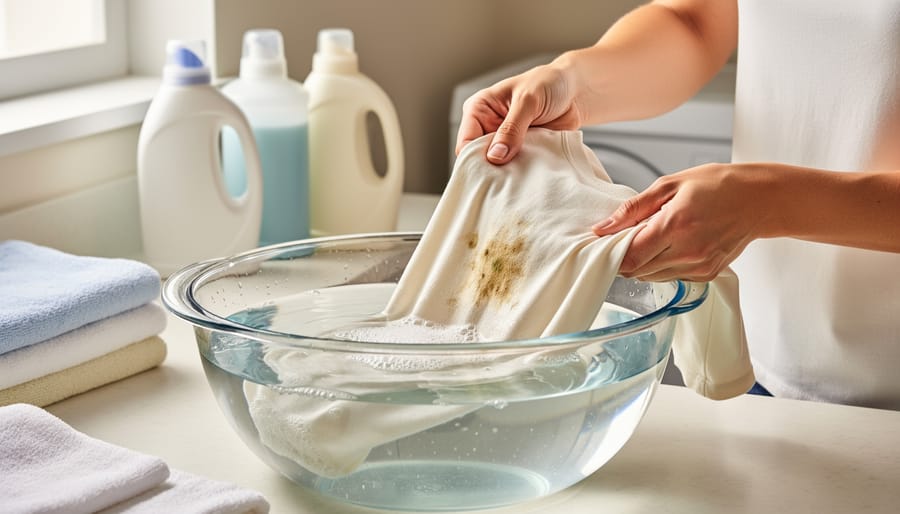
Once you’ve applied your natural treatment, work it gently into the fabric using circular motions with your fingertips or a soft-bristled brush. Never scrub aggressively, this damages fibers and can spread the stain. Instead, use light pressure and let the treatment do the chemical work.
For fresh stains, 15-30 minutes of soaking usually suffices. Set-in stains and residue buildup need patience: soak for 2-8 hours or overnight in cool water with your treatment solution. Check progress periodically by lifting the garment to see if the stain has loosened.
Change the soaking water if it becomes visibly discolored, this prevents redeposit of released stains back into the fabric. For delicate fabrics like silk or wool, limit soaking to under an hour and use cooler water to prevent fiber weakening.
Rinse and Launder Properly
After treating the stain, rinse thoroughly under cold running water until the water runs completely clear. Any treatment residue left in the fabric can attract dirt or create new marks. Hold the fabric taut and flush from the back of the stain to push particles out rather than deeper into fibers.
Once rinsed, check the stain in good lighting before machine washing. If traces remain, repeat treatment now, heat from the dryer will permanently set anything you missed. When ready to launder, use cool or warm water (never hot on treated areas) and select a plant-based detergent without added dyes or fragrances that might react with your natural treatments. Skip fabric softener, which can seal in residue. Air-dry the garment completely before assessing success.
Tackling Specific Stubborn Stains
Oil and Grease
Oil and grease stains respond best to absorbent materials that lift the oil before it bonds with fabric fibers. For fresh grease, immediately blot excess with a clean cloth, don’t rub, which pushes oil deeper. Cover the stain generously with cornstarch or baking soda and let it sit for 15-30 minutes to absorb the oil. Brush off the powder, then apply a small amount of eco-friendly dish soap directly to the spot. Dish soap breaks down grease effectively because it’s designed to tackle oils. Work it gently into the fabric with your fingers or a soft brush, creating a light lather. Let it sit for 5-10 minutes, then rinse with warm water. Check before laundering, if any shadow remains, repeat the treatment rather than applying heat, which will set the stain permanently.
Wine, Coffee, and Tea
Tannin stains from coffee, wine, and tea respond well to acid-based treatments that break down the color compounds. Blot fresh spills immediately, never rub, then stretch the fabric over a bowl and pour boiling water through from a height to flush out tannins. For set-in stains, mix equal parts white vinegar and cold water, soak for 15 minutes, then sprinkle with salt to draw out remaining color. Work gently from the stain’s edges inward. Stubborn marks benefit from a paste of oxygen bleach alternative (sodium percarbonate mixed with water) applied for 30 minutes before washing. Red wine yields especially well to white wine or club soda immediately after spilling, followed by the vinegar treatment.
Deodorant and Sweat Marks
Deodorant buildup creates those crusty white or yellow patches under arms that won’t wash out with regular detergent. The aluminum compounds and waxy ingredients literally cement onto fabric fibers. Start by mixing equal parts white vinegar and water in a bowl, then submerge the affected area for 30 minutes, the acetic acid breaks down the residue bond. For yellow sweat stains on white shirts, make a paste from two parts baking soda to one part hydrogen peroxide, spread it over the marks, and let sit for an hour before washing. The oxidizing action lifts embedded oils and proteins. Skip fabric softener going forward, as it compounds the buildup problem.
Ink and Dye Transfer
Ink and dye transfer demand patience more than elbow grease. Rubbing alcohol (isopropyl) breaks down ink pigments effectively, dab it onto the stain with a cotton ball, working from the outside in to prevent spreading. Let it sit for five minutes, then blot with a clean cloth. Repeat until the stain lifts. For dye transfer from colored garments, soak the affected piece in a solution of one part white vinegar to four parts cold water for 30 minutes before laundering. These stains rarely disappear in one attempt; treating twice gently beats scrubbing once aggressively and potentially damaging fibers.
Blood and Protein Stains
Blood stains demand cold water, always. Hot water cooks the protein into fabric, making removal nearly impossible. Rinse fresh blood immediately under cold running water from the back of the stain, pushing it out rather than deeper in. For set-in blood, soak the garment in cold salt water (two tablespoons per litre) for at least two hours. Salt draws protein out of fibres naturally.
After soaking, apply a paste of cold water and meat tenderiser containing papain enzyme, which breaks down protein bonds. Leave for thirty minutes, then rinse cold. Hydrogen peroxide works brilliantly on white fabrics, pour directly on the stain and watch it foam as it lifts blood. For colours, stick with enzyme treatments. Repeat if needed before laundering in cold water with enzyme detergent.
Removing Detergent and Fabric Softener Residue

That dingy, dull appearance on clothes you’ve washed repeatedly? That stiff, waxy feel on towels or workout gear? It’s probably not dirt, it’s buildup from the very products meant to clean them. Conventional detergents and fabric softeners leave behind a film that accumulates over time, trapping oils, minerals from hard water, and chemical residues in the fibers. This layer makes colors look faded, whites appear grey, and fabrics lose their absorbency. The good news: you can reverse this buildup with natural stripping methods and prevent it from returning.
Start with a vinegar rinse for light to moderate buildup. Add one cup of distilled white vinegar to your washing machine’s rinse cycle (or directly into the drum) and run a hot wash with no detergent. The acetic acid breaks down soap scum and mineral deposits without harming fibers. For heavier buildup on towels, athletic wear, or cloth diapers, try a washing soda soak. Fill a bathtub or large basin with the hottest water safe for your fabrics, add half a cup of washing soda (sodium carbonate, not baking soda), and submerge items for four to six hours, stirring occasionally. The alkaline solution lifts embedded residues that regular washing misses. Drain, then run through a normal wash cycle with minimal detergent.
Prevention matters as much as treatment. Use less detergent than you think you need; most people overdo it by half. Hard water amplifies buildup, so consider adding washing soda to every load in mineral-heavy areas. Avoid fabric softener altogether, it coats fibers with synthetic chemicals that reduce absorbency and trap odors. If your clothes feel clean, look brighter after stripping, and regain their original texture, you’ve succeeded in giving them a fresh start without reaching for the bin.
How to Know If Your Rescue Worked
Check your rescue under good natural light before the garment hits the dryer. Heat permanently sets stains, turning a fixable problem into a permanent mark. Hold the damp fabric taut and examine both sides where the stain was. If you spot any shadow, discoloration, or sticky residue, the job isn’t done yet.
For lingering traces, repeat your treatment rather than hoping the dryer will finish the job (it won’t). Fresh re-applications often work better now that you’ve loosened the stain’s grip on the fibers. Treat it again, let it sit longer this time, then rinse thoroughly.
Sometimes a faint ghost of the original stain remains after multiple attempts. That’s your decision point. If the garment is wearable and the mark barely shows, you’ve still won. Not every rescue means perfection. A small shadow on a t-shirt you’d otherwise bin is still a garment saved from landfill.
Air-dry suspicious spots first. Once completely dry, reassess in daylight. Stains often look worse when wet. If the mark has faded to near-invisible, celebrate that victory. You’ve extended this piece’s life, reduced waste, and practiced real sustainability.
The goal isn’t museum-quality restoration on every item. It’s keeping wearable clothes in rotation instead of the trash. Some garments earn their character marks through years of use, and that’s perfectly fine. Save what you can, wear what works, and count each rescued piece as progress.
Next Steps: Building Your Clothing Rescue Habit
Turning stain removal into a lasting habit transforms it from a one-off rescue mission into a core part of your sustainable lifestyle. Start by setting up a dedicated stain-fighting station in your laundry area, a small basket or shelf stocked with white vinegar, baking soda, castile soap, a soft brush, and microfiber cloths. Having everything in one spot eliminates the friction of hunting for supplies when a spill happens, making you far more likely to tackle stains immediately rather than letting them set.
Create a simple quick-reference card listing common stains and their go-to treatments, then tape it inside a cabinet door or snap a photo for your phone. You’ll stop second-guessing yourself and act faster, which dramatically improves your success rate.
Track your wins. Keep a running tally, mental or written, of garments you’ve saved from the bin this month. Seeing that number grow reinforces the habit and reveals your tangible impact on waste reduction. Share these victories with the Unique Junk community through social media or local swap groups; your success stories inspire others and build collective momentum around garment longevity.
Connect with eco-brands that align with this mission. Many sustainable companies offer refill programs for natural cleaning products or educational resources on extending clothing life. Supporting these businesses creates a positive feedback loop between your values and your purchasing choices, making it easier to avoid fast fashion cycles altogether.
Finally, teach someone else. Whether it’s a family member, roommate, or friend, passing along one technique you’ve mastered multiplies the impact. Clothing rescue becomes contagious when people see real results, and every conversation shifts the cultural narrative from disposable to repairable.
Common Questions About Stain Removal
How long after a stain happens can I still rescue the garment?
Fresh stains are easiest to remove, but even set-in stains that have been through the dryer or sat for months can often be lightened or fully removed with patience and repeated treatments. The key is persistence rather than giving up after one attempt.
Are natural stain removers really as effective as commercial products?
Yes, for most common stains, natural solutions like white vinegar, baking soda, and oxygen bleach work just as well as chemical-heavy alternatives. They take slightly more time and elbow grease in some cases, but they’re safer for your skin, your clothes, and the environment.
Can I use these methods on delicate fabrics like silk or wool?
Delicate natural fibers need gentler handling: always test treatments on hidden areas first, use cooler water, skip vigorous scrubbing, and consider shorter soaking times. For valuable or very delicate items, professional eco-friendly cleaning might be worth the investment.
When is it actually okay to let a stained item go?
If you’ve tried multiple treatments and the stain remains visible after several attempts, or if the fabric itself is damaged beyond repair, it’s fine to accept that the garment has reached the end of its wearable life. The sustainable choice then is textile recycling or repurposing the fabric rather than binning it entirely.
These questions come up constantly in sustainability circles, and they deserve honest answers. The truth is that stain removal isn’t always instant magic, but it’s almost always worth trying before you give up on a garment. When you commit to rescuing clothes instead of replacing them, you’re participating in ethical and sustainable fashion at the most practical level, keeping textiles in use longer and refusing the convenience of disposability.
The learning curve is real. Your first few attempts might not work perfectly, and that’s normal. What matters is building the habit of reaching for your stain kit instead of the bin. Each rescue attempt teaches you something about fabric, chemistry, and patience. You’ll develop instincts for which treatments work best in your home with your water and your wardrobe. That knowledge becomes part of your everyday sustainability practice, something you can share with friends and family who are also trying to reduce waste and make their clothes last.
Every garment you rescue is more than just a shirt or pair of trousers saved from the bin. It represents water conserved, carbon emissions avoided, and a small but meaningful rebellion against throwaway culture. You now have the knowledge and techniques to give stained clothes a genuine second chance, transforming what seemed like rubbish into wearable wins.
Start small this week. Choose one stained item you were about to discard and apply what you’ve learned here. Snap a before-and-after photo of your success and share it with the Unique Junk community. Your story might inspire someone else to try, creating a ripple effect of rescued clothes and reduced waste.
As you build your clothing rescue practice, explore partnerships with eco-conscious brands that align with these values. The right natural cleaning products make sustainable choices easier and more effective.
Remember, perfection isn’t the goal. Some stains will fade rather than vanish completely, and that’s absolutely fine. A slightly marked but wearable garment still beats a perfectly pristine landfill contribution. Together, one rescued piece at a time, we’re building a culture where clothing lasts longer and waste becomes the exception rather than the rule.